
Metacat Installation - Registry
|
Metacat Installation - Registry
|
||||||
| KNB Home | Data | People | Informatics | Biocomplexity | Education | Software | |
|
Installing the Metacat Registry |
|
| Author: Shaun Walbridge Date: 06/06/2008 |
|
The Metacat Registry provides an easy mechanism to create and edit simple EML metadata documents, and accounts for your Metacat users. It is an optional component of Metacat, but is useful when you need very low barriers to creating simple EML, or have users unable to use Morpho. The LDAP account management interface is useful if you are authenticating users against LDAP, and need to provide a basic mechanism for managing user accounts.
The Registry can be installed on any machine Metacat runs on, but does require additional legwork to get it installed. It requires that Metacat is set deployed behind Apache, as our recommended installation platform, and the instructions assume Apache is already installed and working correctly.
Download and extract the Metacat release:
mkdir metacat && cd metacat
wget http://knb.ecoinformatics.org/software/dist/metacat-src-1.8.0.zip
unzip metacat-src-1.8.0.zip
cd metacat-1.8.0
export METACAT=`pwd`
Build the Metacat Perl client library:
cd $METACAT/src/perl/Metacat
perl Makefile.PL
sudo make
sudo make install
Install the system libraries needed. On Redhat:
sudo yum install gcc libxml2-devel libxslt-devel ant -y
On Debian:
sudo apt-get install ant libappconfig-perl libxml-libxml-perl libxml-libxslt-perl \
libtemplate-perl libcgi-session-perl libdigest-sha1-perl libnet-ldap-perl \
libterm-readkey-perl libxml-dom-perl libsoap-lite-perl -y
You will need to install one package using cpan
sudo cpan -i Config::PropertiesInstall CPAN, which allows us to install the Perl dependencies for the registry and account management parts of Metacat. If asked to manually configure cpan, type 'no' and CPAN will be setup with its default values.
sudo yum install perl-CPAN
sudo cpan
You should now see a prompt which looks like:
cpan>
The rest of the commands will assume you're inside of CPAN. Let's get the most recent version of the CPAN software. Just press return after any prompts you recieve during this process.
install Bundle::CPAN
reload cpan
Install the required modules. Here we're installing an old LibXSLT, as the current one requires a newer libxslt than is available on Redhat 4 & 5. Again, just answer 'yes' to any questions.
install AutoLoader
install CGI
install CGI::SEssion
install LWP::UserAgent
install Net::LDAP
install Template
install URI
install MSERGEANT/XML-LibXSLT-1.58.tar.gz
Now visit the resulting URL:
http://localhost/knb/cgi-bin/register-dataset.cgi?cfg=nceas
If everything worked correctly, you should see a page like
this: 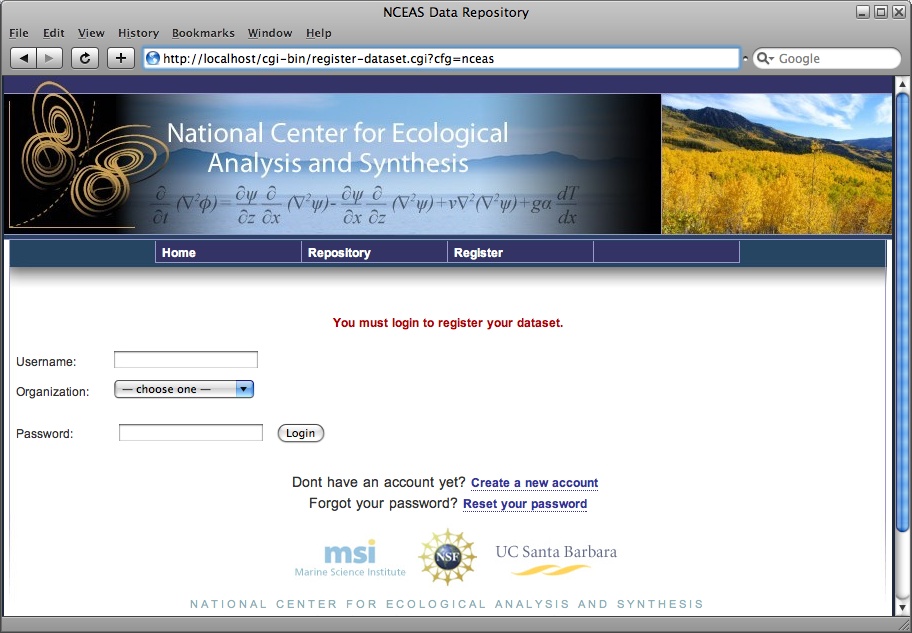
These are special instructions required for the NCEAS skin to get a current projects list from the AdminDB, and can safely be ignored in all other uses.
Download and install the Oracle Instant Client RPMs. These can be obtained from the oracle website.
rpm -i oracle-instantclient-basic-10.2.0.3-1.i386.rpm
rpm -i oracle-instantclient-devel-10.2.0.3-1.i386.rpm
rpm -i oracle-instantclient-sqlplus-10.2.0.3-1.i386.rpm
Next, we'll need an
tnsnames.orafile for Oracle to locate the server we're connecting to. In this example, we'll copy it from a remote location:
mkdir -p /usr/lib/oracle/10.2.0.3/network/admin/ && cd !$
scp walbridge@knb.ecoinformatics.org:/usr/lib/oracle/10.1.0.4/network/admin/tnsnames.ora .
The AdminDB is accessed via Perl, so install the needed Oracle driver using CPAN:
cpan
install DBI
install DBD::Oracle
Now we can install the AdminDB module itself:
mkdir -p ~/projects/admindb && cd !$
export CVSROOT=:ext:walbridge@cvs.nceas.ucsb.edu:/cvsnceas
cvs co admindb
cd admindb/perl/NCEAS/AdminDB
perl Makefile.PL
make
sudo make install
Finally, set the correct properties in the
nceas.cfgfile:
nceas_db = //hyperion.nceas.ucsb.edu:1521/nceasp.nceas.ucsb.edu
nceas_db_user = admowner
nceas_db_password = NCEAS_DB_READ_PASSWORD_HERE
A quick check of
register-dataset.cgishould now show a complete list of projects:

Redhat based, tested on Centos 5
Debian based, tested on Ubuntu 8.04